Neptune Quickstart
To get started with using CloudWanderer with the Gremlin Connector in order to see the power of GraphDBs quickly we’ve created the neptune-quickstart cloudformation template.
With this deployment you’ll be able to quickly run CloudWanderer in your own AWS environment and run both OpenCypher and Gremlin queries against the data to see the real power of treating your resources as vertices on a graph.
Launch your CloudFormation Stack
First off, let’s start by visiting the neptune-quickstart repo and clicking on the “Launch Stack” button for your favourite region.
Warning
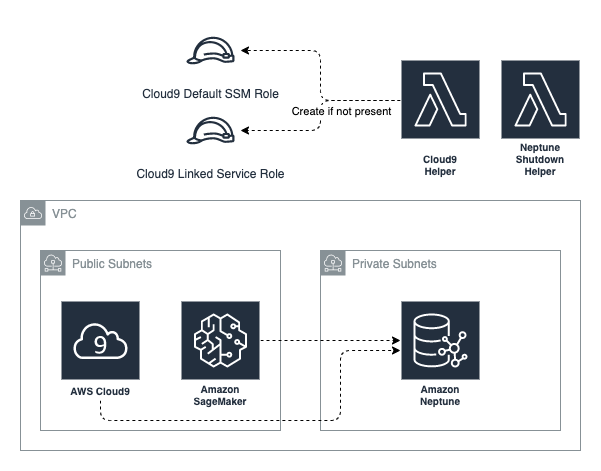
This will launch a Neptune database, Cloud9 IDE, and Sagemaker Notebook in your AWS account. These resources incur small amounts of cost even though they are configured to shut down automatically and are sized to the smallest instances. Please read the details of the neptune-quickstart repo for more information.
Once this stack has completed deployment (which will take about 20 minutes so you may want to make some coffee at this point), you can
navigate to the Outputs tab and open the Cloud9Link and SageMakerNotebookLink urls in new tabs.
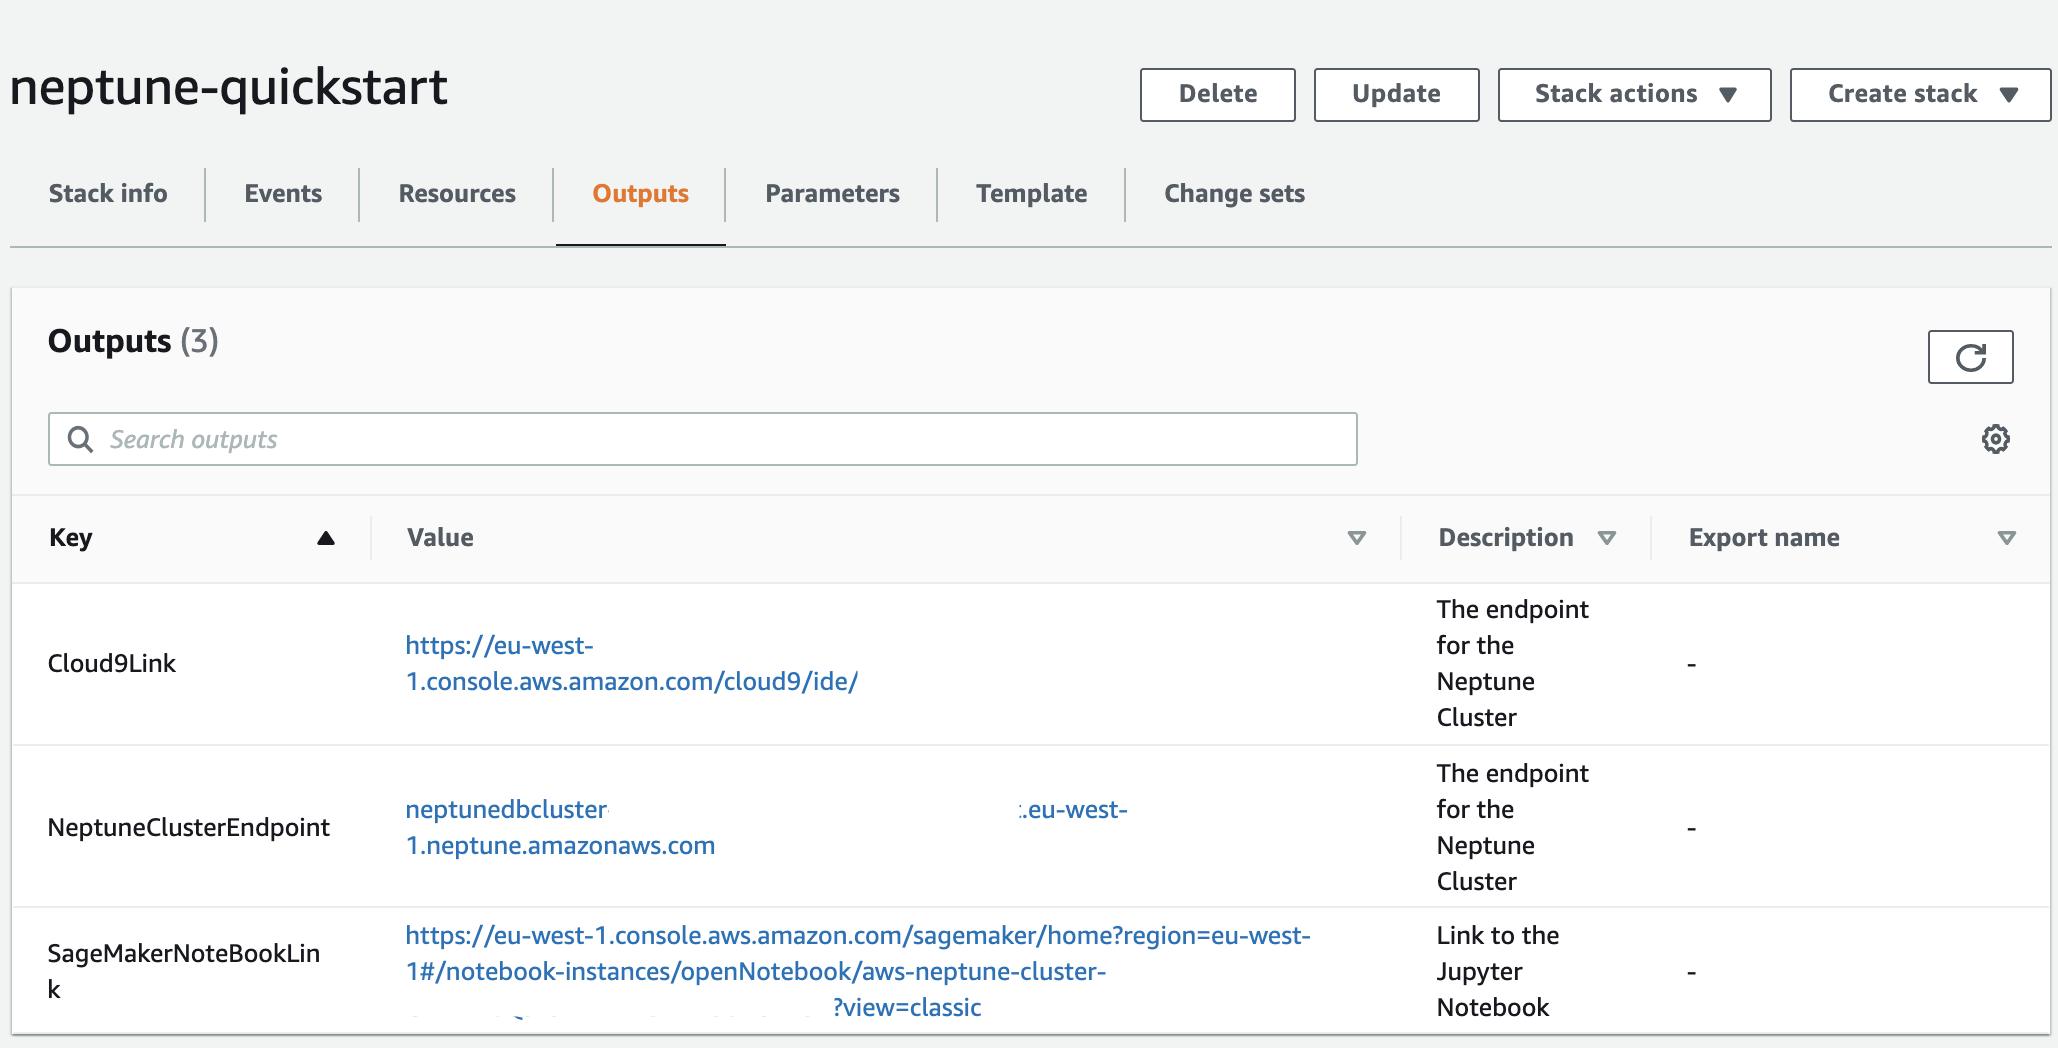
Take note of that NeptuneClusterEndpoint value as we’ll be using this in a moment!
Cloud9 Setup
Once you’re in your Cloud9 IDE, open up the terminal and type the following commands.
git clone https://github.com/CloudWanderer-io/CloudWanderer.git
cd CloudWanderer
python -m venv .venv
source .venv/bin/activate
pip install --upgrade pip
pip install -r requirements.txt
export AWS_DEFAULT_REGION=$(curl http://169.254.169.254/latest/meta-data/placement/availability-zone -s | sed -E 's/[a-z]$//')
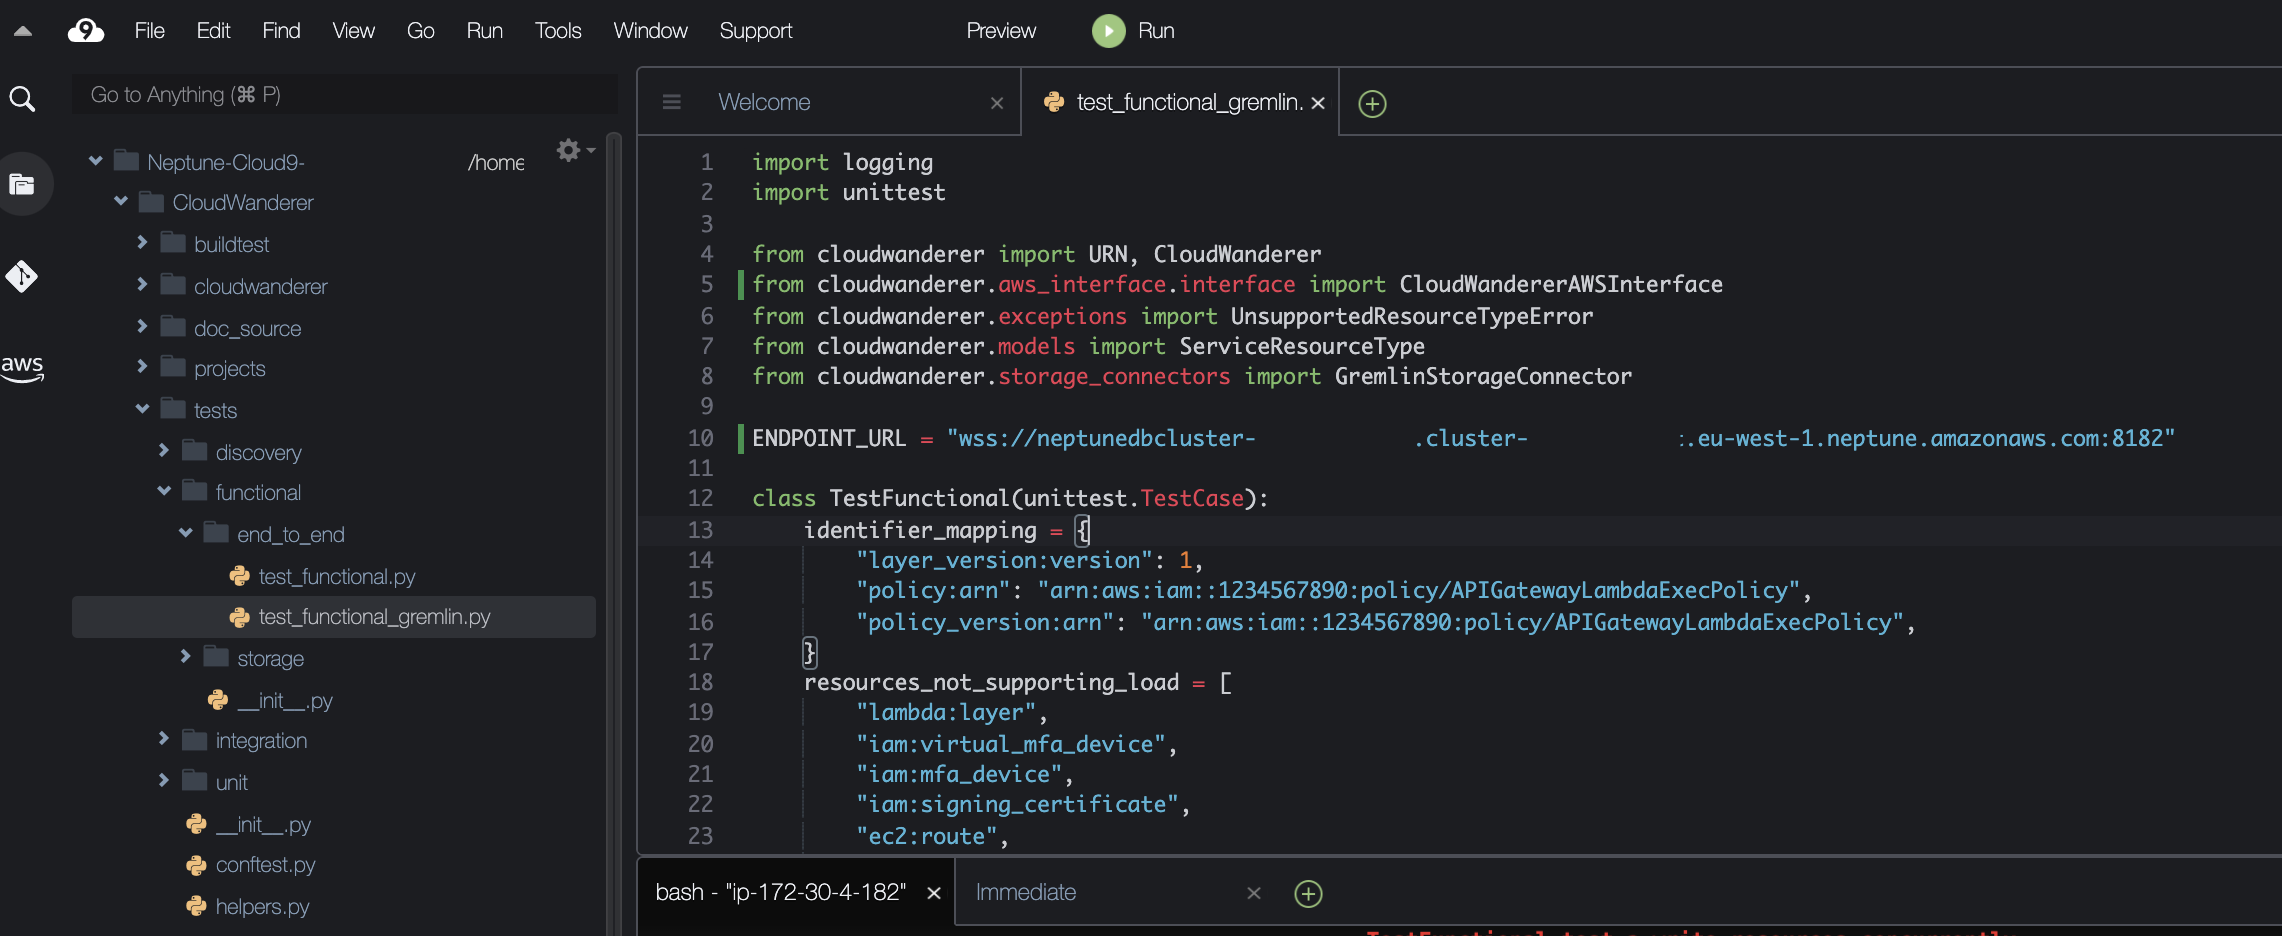
Once that’s complete, open up ./tests/functional/end_to_end/test_functional_gremlin.py and locate the ENDPOINT_URL global variable and
update it to reflect your stack’s endpoint url.
Tip
Make sure your ENDPOINT_URL is prefixed with wss:// not ws:// as AWS Neptune uses SSL!
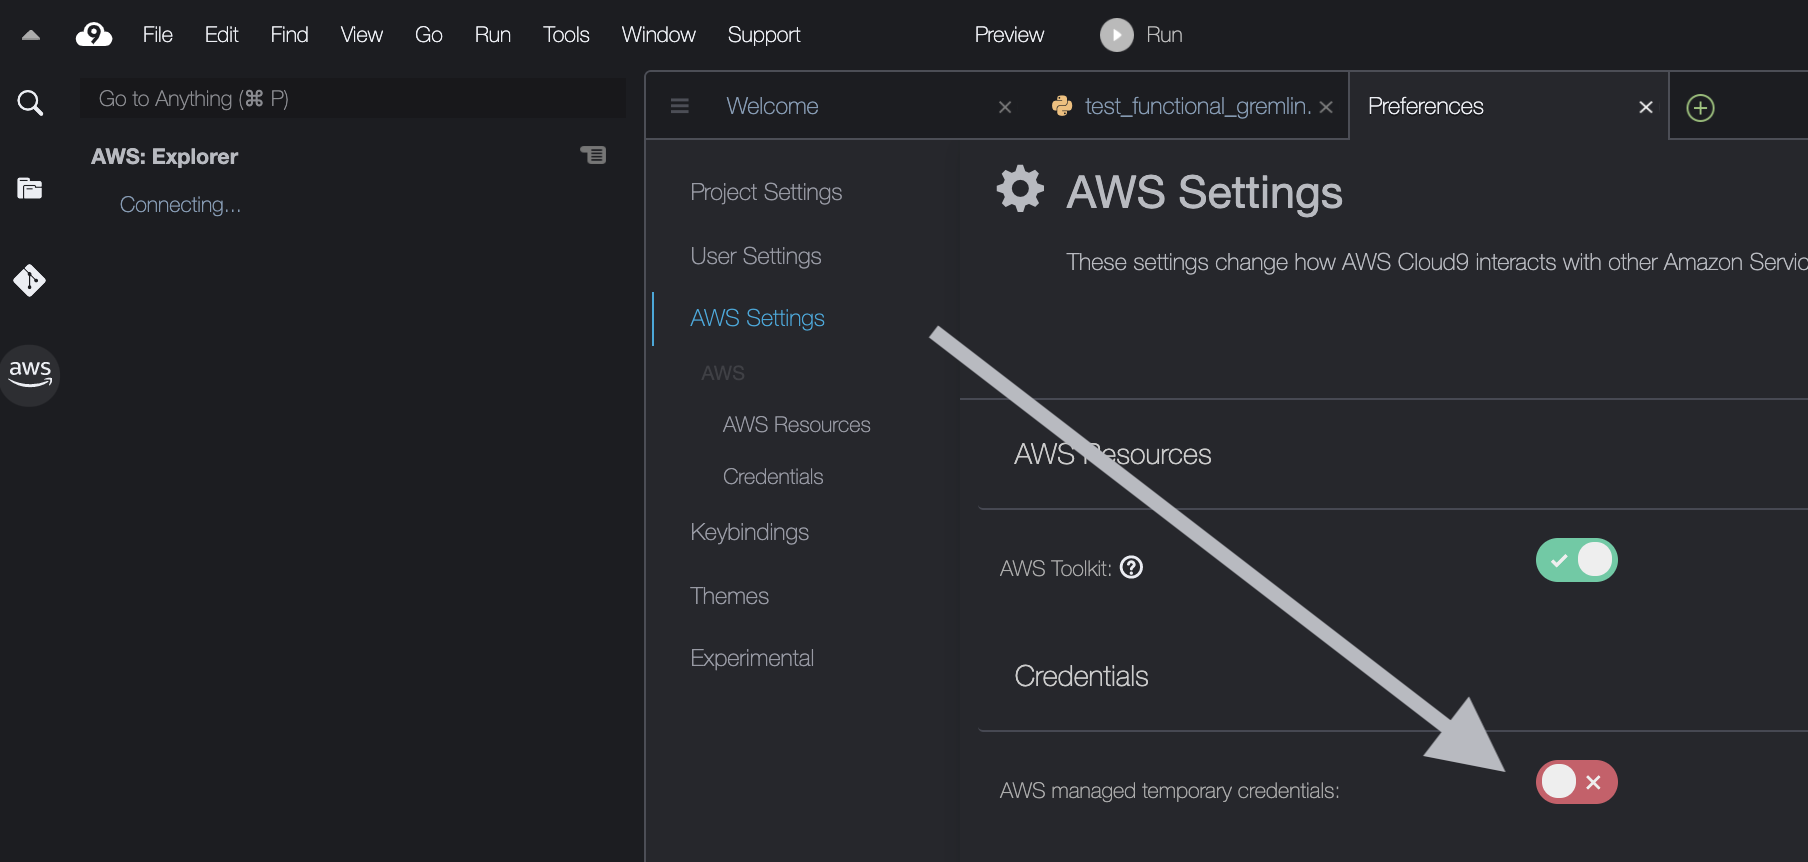
Finally, disabled AWS temporary credentials by clicking on the cog icon in the top right to go to Preferences, then click on AWS Settings and disable AWS managed temporary credentials.
Running CloudWanderer
Now you can run CloudWanderer!
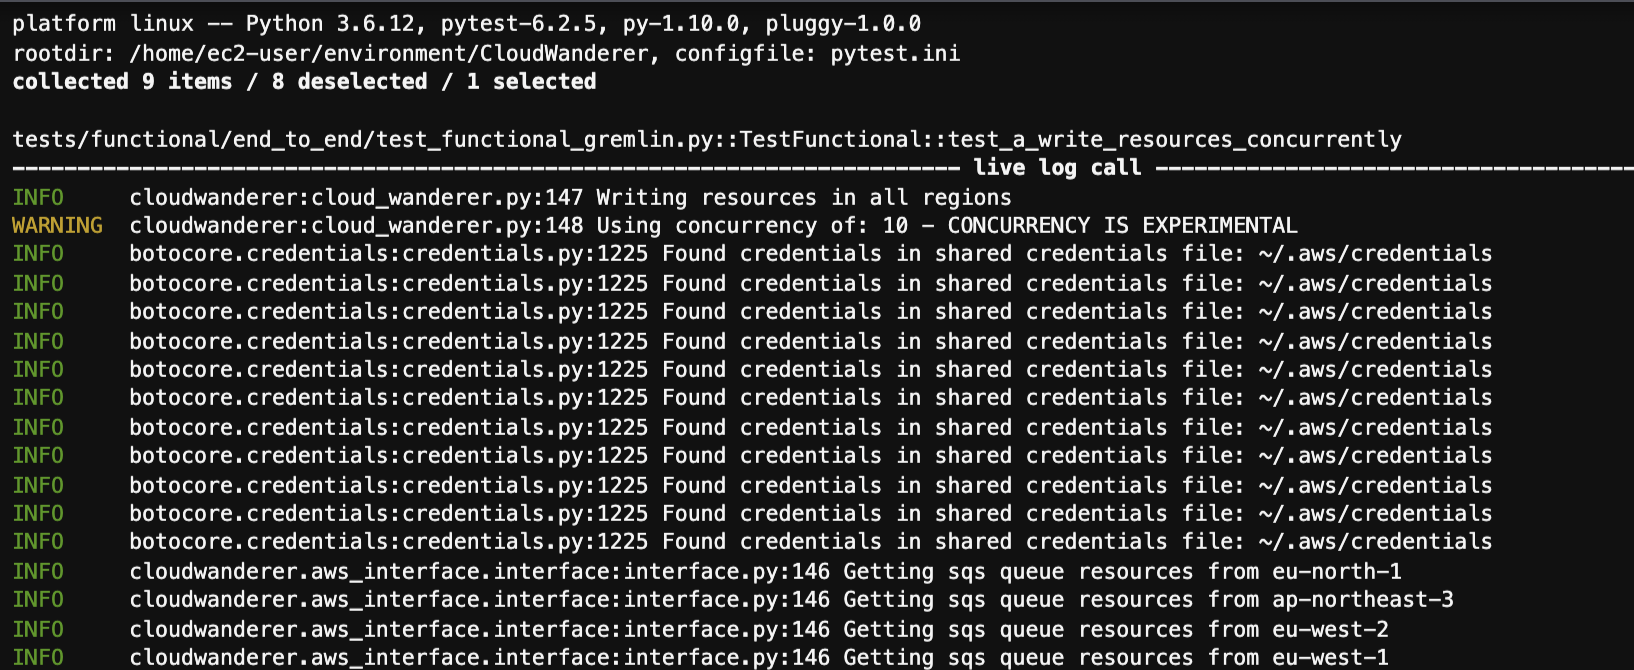
pytest tests/functional/end_to_end/test_functional_gremlin.py -k concurrently
Tip
If you get an error An error occurred (InvalidClientTokenId) when calling the GetGroupPolicy operation: The security token included in the request is invalid
make sure you disabled AWS managed temporary credentials in the Cloud9 setup above!
Querying Neptune
You can now go to your Sagemaker Notebook link from earlier and create a new Python3 notebook.

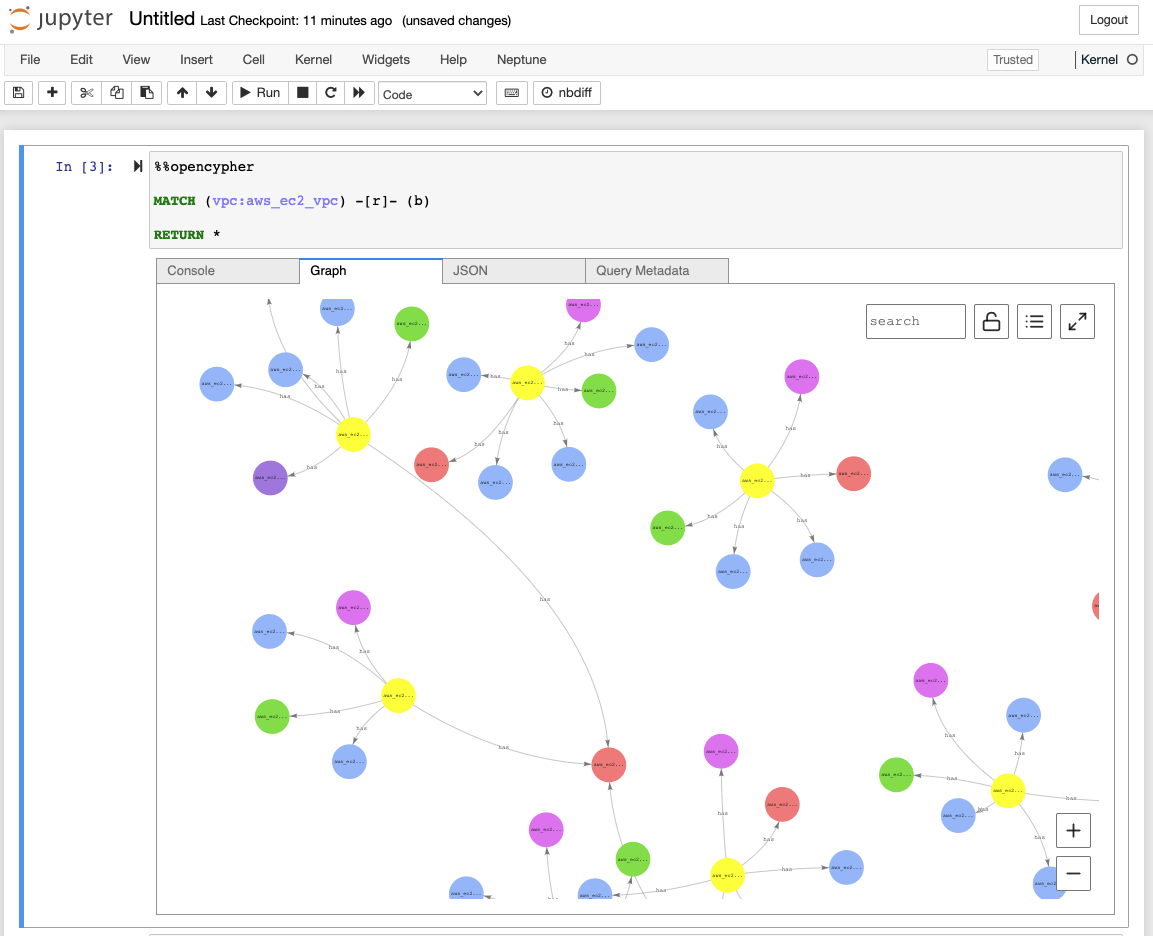
Now in your new Jupyter Notebook cell enter in the following:
%%opencypher
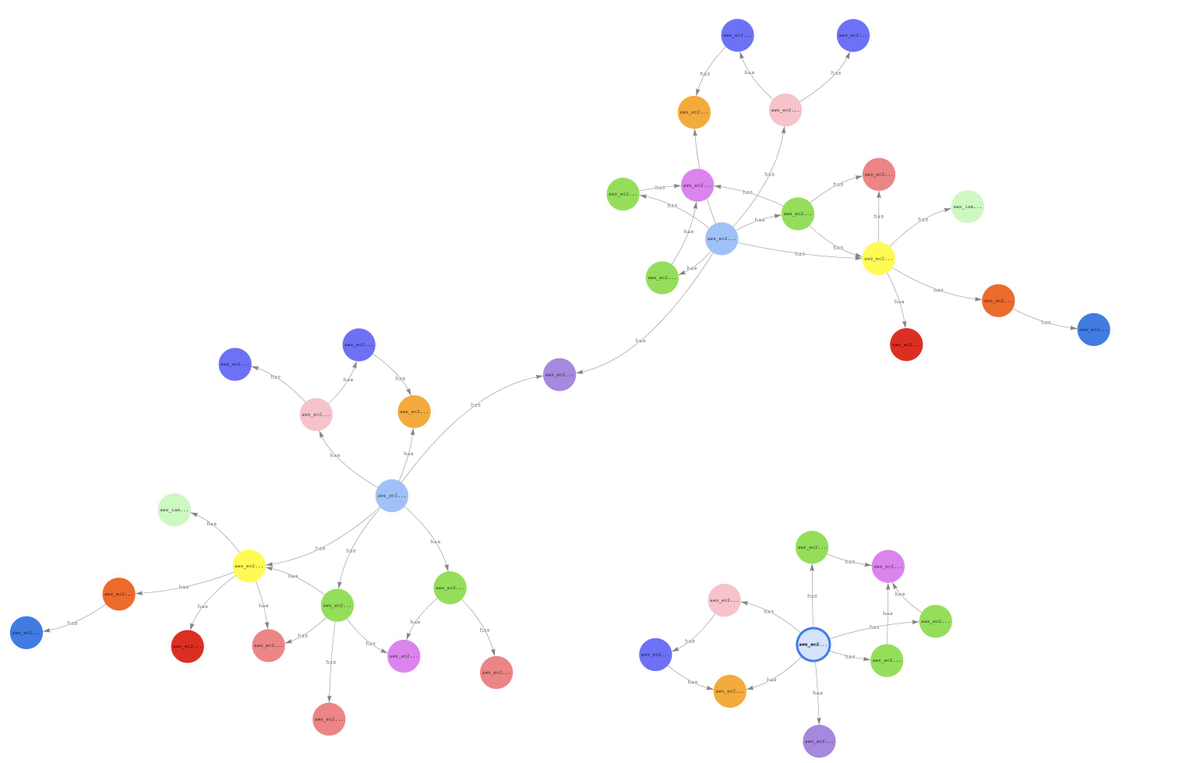
MATCH (vpc:aws_ec2_vpc) -[r]- (b)
RETURN *
This will tell the notebook to query Neptune using OpenCypher and return every vertex that has an edge with any VPC in your AWS account.
Voila! Now you need to learn OpenCypher, Gremlin, or SparQL to query your new graph! We recommend OpenCypher as it’s the easiest to use, especially if you’re familiar with writing SQL queries.